
Chocolate chip scones are a bakery favorite with crisp golden edges, tender flaky centers, and plenty of melted chocolate chips in every bite. They’re easy to make at home and perfect for breakfast, brunch, or an afternoon treat.
This easy chocolate chip scones recipe uses cold butter and heavy cream to create soft, buttery layers with a rich chocolate flavor. You’ll have warm, bakery-style scones on the table in under an hour.

Why This Recipe Works
Cold butter creates flaky layers. Small pieces of cold butter remain solid while the dough is being shaped. As the scones bake, that butter melts and releases steam, creating light pockets and tender layers.
Heavy cream keeps the centers soft. Cream provides both moisture and fat, helping the scones stay rich and tender instead of becoming dry or bread-like.
Minimal mixing prevents tough scones. Overworking the dough develops too much gluten. Mixing only until the ingredients hold together produces a softer and more delicate crumb.
Chilling the shaped dough improves the texture. A brief rest in the refrigerator or freezer firms the butter again and helps the scones rise more evenly in the oven.
A hot oven creates bakery-style edges. Baking at a relatively high temperature helps the exterior become golden while the centers remain moist and tender.
Ingredients You’ll Need
- 2 cups all-purpose flour
- ⅓ cup granulated sugar
- 1 tablespoon baking powder
- ½ teaspoon salt
- ½ cup cold unsalted butter, cut into small cubes
- ¾ cup semi-sweet chocolate chips
- ½ cup cold heavy cream, plus more if needed
- 1 large egg
- 2 teaspoons vanilla extract
- 1 tablespoon heavy cream, for brushing
- 1 tablespoon coarse sugar, optional
Ingredient Notes and Substitutions
- All-purpose flour: Measure the flour carefully by spooning it into the measuring cup and leveling the top. Scooping directly from the bag can compact the flour and make the scones dry.
- Butter: Unsalted butter gives you better control over the flavor. If using salted butter, reduce the added salt to ¼ teaspoon.
- Heavy cream: Heavy cream produces the richest and softest texture. Whole milk may work in a pinch, but the scones will be slightly less tender.
- Chocolate chips: Semi-sweet chocolate balances the buttery dough without making the scones overly sweet. Dark chocolate, milk chocolate, or chopped chocolate can also be used.
- Vanilla: Vanilla strengthens the bakery-style flavor and complements the chocolate.
- Coarse sugar: This is optional, but it adds a delicate crunch and a polished bakery finish.
For another easy homemade chocolate treat, try these chocolate chip cookie bars, which have a similarly rich chocolate flavor with a soft, chewy center.
Step-by-Step Instructions
1. Prepare the baking sheet
Line a large baking sheet with parchment paper. Set it aside while you prepare the dough.
Preheat the oven to 400°F. If your kitchen is warm, you can wait to preheat the oven until the shaped scones are chilling.
2. Combine the dry ingredients
In a large mixing bowl, whisk together the flour, granulated sugar, baking powder, and salt.
Whisking distributes the baking powder evenly, which helps the scones rise consistently instead of developing uneven pockets.
3. Cut in the cold butter
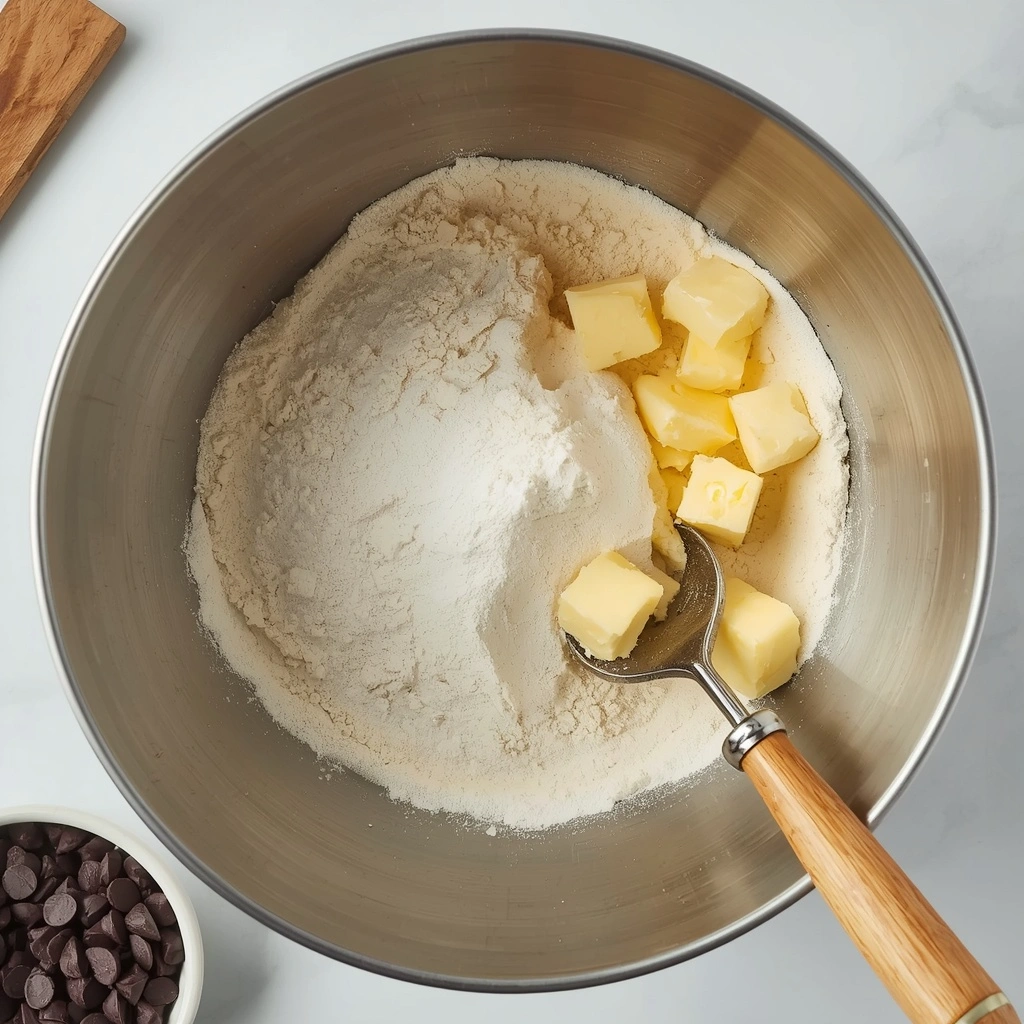
Add the cold butter cubes to the flour mixture. Use a pastry cutter, fork, or your fingertips to work the butter into the flour.
Stop when the mixture resembles coarse crumbs with several visible pea-sized pieces of butter remaining. Do not blend the butter completely into the flour. Those larger cold pieces are what help create flaky layers.
4. Add the chocolate chips
Stir the chocolate chips into the flour and butter mixture. Coating them lightly in flour helps keep them evenly distributed through the dough.
5. Mix the wet ingredients
In a separate small bowl, whisk together the heavy cream, egg, and vanilla extract until smooth.
Pour the wet mixture into the dry ingredients.
6. Form the dough
Use a fork or spatula to gently mix until a rough, shaggy dough forms. Some dry flour may remain at the bottom of the bowl.
Turn the mixture onto a lightly floured marble, quartz, or clean stone surface. Gently press the dough together with your hands. Avoid kneading it like bread dough.
If the dough is too dry to hold together, add one tablespoon of cold cream at a time. The dough should be slightly crumbly but should hold when pressed.
7. Create flaky layers
Pat the dough into a rectangle approximately one inch thick.
Fold one side toward the center, then fold the opposite side over it, similar to folding a letter. Turn the dough and gently flatten it again.
Repeat this folding process one more time. This simple technique creates additional layers without overworking the dough.
8. Shape the scones
Shape the folded dough into a circle approximately seven inches wide and one inch thick.
Use a sharp knife or bench scraper to cut the circle into eight equal wedges.
Place the wedges on the prepared baking sheet, leaving space between each one.
9. Chill the dough
Place the baking sheet in the refrigerator for 20 to 30 minutes, or in the freezer for approximately 15 minutes.
This step helps the butter firm up and reduces spreading during baking.
10. Brush and bake
Brush the tops lightly with heavy cream and sprinkle with coarse sugar if desired.
Bake for 18 to 22 minutes, or until the tops are lightly golden and the edges are set.
Allow the scones to rest on the baking sheet for five minutes before transferring them to a cooling rack.
Pro Tips for Perfect Chocolate Chip Scones
- Freeze the butter for 10 minutes before cutting it into the flour. Extra-cold butter is easier to handle and less likely to soften while you work.
- Keep the cream and egg refrigerated until needed. Cold ingredients help maintain the temperature of the dough.
- Do not make the dough perfectly smooth. A slightly rough dough usually produces a more tender scone than a heavily kneaded one.
- Use a sharp knife when portioning the dough. Pressing down with a dull utensil can seal the edges and interfere with the rise.
- Space the wedges apart for crisp edges. For softer sides, arrange them closer together.
- Bake directly from cold. Do not allow the shaped scones to sit at room temperature before baking.
- Add a few chocolate chips to the tops before baking. This creates a more attractive bakery-style appearance.
Common Mistakes to Avoid
Allowing the butter to become warm
Warm butter blends into the flour instead of producing steam pockets. If the dough begins to feel soft or greasy, chill it before continuing.
Adding too much flour
A small amount of flour on the work surface is helpful, but too much can make the dough dry. Use only enough to prevent sticking.
Overmixing the dough
The dough does not need to look smooth. Mix only until it holds together when pressed.
Adding too much liquid
The dough should be moist enough to hold its shape but not wet or sticky. Add extra cream gradually, one tablespoon at a time.
Skipping the chilling step
Unchilled scones are more likely to spread and lose their layered texture. Even 15 minutes in the freezer can make a noticeable difference.
Baking too long
Scones continue to firm slightly as they cool. Remove them when the tops are lightly golden and the centers are just baked through.
Storage and Make-Ahead Tips
Store completely cooled chocolate chip scones in an airtight container at room temperature for up to two days.
For slightly longer storage, refrigerate them for up to five days. Allow refrigerated scones to come to room temperature before serving, or warm them briefly in the oven.
To reheat, place a scone in a 300°F oven for five to eight minutes. This restores the crisp exterior more effectively than microwaving.
Freezing baked scones
Wrap each cooled scone tightly and place it in a freezer-safe container. Freeze for up to two months.
Thaw at room temperature, then warm in the oven before serving.
Freezing unbaked scones
Arrange the shaped wedges on a lined baking sheet and freeze until firm. Transfer them to a freezer-safe bag or container.
Bake directly from frozen, adding approximately three to five minutes to the normal baking time.
This makes it easy to bake only one or two fresh scones whenever you need them.
Serving Suggestions
- Serve warm with butter or softened cream cheese.
- Pair with coffee, tea, or a glass of cold milk.
- Add fresh strawberries, raspberries, or blueberries on the side.
- Serve as part of a weekend breakfast with easy blueberry muffins.
- Pair with a creamy Greek yogurt breakfast bowl for a more filling breakfast.
- Add the scones to a dessert table alongside fudgy chocolate brownies and classic vanilla cupcakes.
Variations to Try
Double chocolate scones
Replace two tablespoons of flour with unsweetened cocoa powder and use a mixture of semi-sweet and white chocolate chips.
Chocolate orange scones
Add one tablespoon of finely grated orange zest to the dry ingredients. Orange adds brightness without changing the dough consistency.
Espresso chocolate chip scones
Whisk one to two teaspoons of instant espresso powder into the heavy cream before adding it to the dough.
Chocolate pecan scones
Replace ¼ cup of the chocolate chips with chopped pecans or walnuts.
Mini chocolate chip scones
Divide the dough in half and shape it into two smaller circles. Cut each circle into eight wedges and reduce the baking time to approximately 12 to 15 minutes.
Glazed chocolate chip scones
Whisk together powdered sugar, a little milk, and vanilla extract. Drizzle the glaze over completely cooled scones.
White chocolate raspberry scones
Replace the semi-sweet chocolate chips with white chocolate chips and gently fold in frozen raspberries. Keep the berries frozen until they are added so they do not release too much juice into the dough.
Frequently Asked Questions
Why are my homemade scones dry?
Dry scones are usually caused by too much flour, too little liquid, or overbaking. Measure the flour carefully and remove the scones as soon as the centers are baked through.
Why didn’t my scones rise?
The baking powder may be old, the butter may have become too warm, or the dough may have been overworked. Fresh baking powder and well-chilled dough provide the best rise.
Can I make chocolate chip scones without heavy cream?
Whole milk or half-and-half can be used, but the texture will be less rich. You may need slightly less liquid because these substitutes are thinner than heavy cream.
Can I prepare the dough the night before?
Yes. Shape and cut the scones, cover them tightly, and refrigerate overnight. Brush with cream and bake them directly from the refrigerator the following morning.
Should scone dough be sticky?
The dough should feel slightly moist and somewhat crumbly, but it should not be wet enough to stick heavily to your hands. If it is very sticky, sprinkle in a small amount of flour.
Can I use frozen butter?
Yes. Frozen butter can be grated directly into the flour mixture. Work quickly so the pieces remain cold.
Can I use chocolate chunks instead of chips?
Yes. Chopped chocolate creates larger melted pockets and gives the scones a more rustic bakery appearance.
Can I make these scones without eggs?
You can replace the egg with approximately ¼ cup of additional heavy cream. The texture may be slightly more crumbly, but the recipe should still work.
Final Thoughts
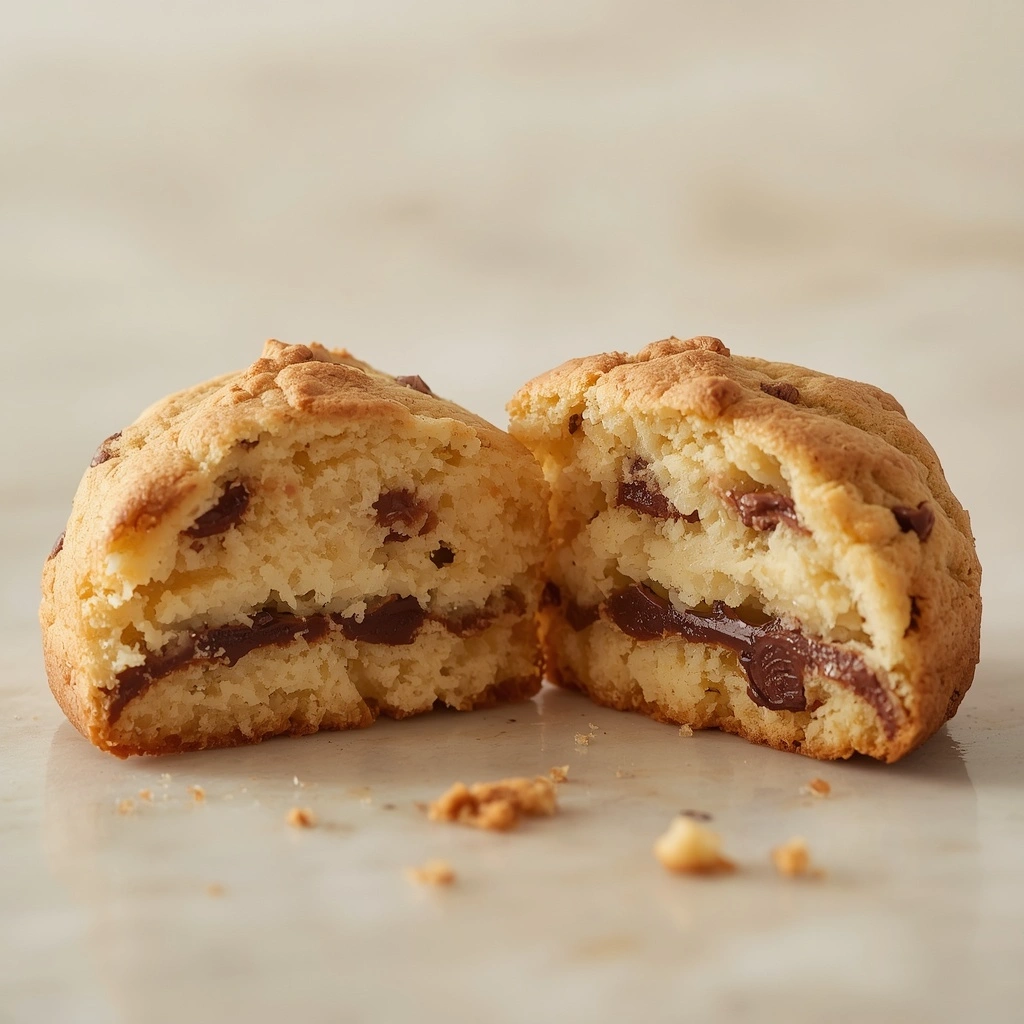
These flaky chocolate chip scones deliver the crisp edges, tender centers, and rich chocolate pockets that make bakery scones so tempting. The method is simple, but keeping the ingredients cold and handling the dough gently makes a major difference.
They are easy enough for an ordinary weekend breakfast yet attractive enough for brunch, holidays, or a homemade dessert spread. You can also shape and freeze them ahead of time, making it possible to enjoy a warm bakery-style scone without preparing a full batch every morning.
For another chocolate-heavy bake, these easy chocolate chip cookies are a dependable classic that pairs perfectly with the same coffee or tea you would serve alongside the scones.
Find more in Dessert